Walkthrough for Hamlet
WALKTHROUGH – Act 1
Act 1
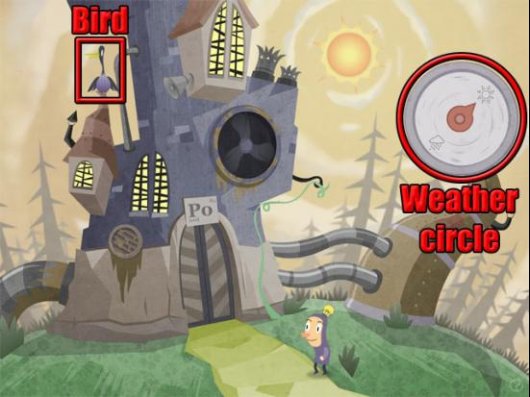
Outside Castle
- Click the weather circle three times to change the weather to sunny. A bird will land on top of the roof:
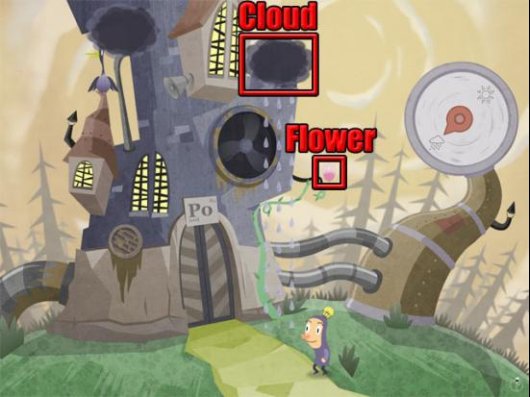
- Click the weather circle twice to change the weather to cloudy. Two clouds will appear.
- Click the right cloud and a pink flower will grow:
- Click the bird and it will fly right to the branch.
- Click the pink flower and the bird will catch the seed.
- Click the bird and it will fly left to the roof.
- Click the megaphone and the bird will drop the seed:

- Click the left cloud and a vine will grow up to the vent.
- Click the cover on the vent to remove it:

- Click the vent to enter the castle.
Dark Room

- Click the hook and two hooks will drop down.
- Click the left hook and two hooks will drop down.
- Click the right hook and one hook will drop down.
- Click the hook to raise the cage.
- Click the ladder to walk onto the platform.
- Click the lever to exit the area.
Password Room
- Press six buttons to spell out the word password. The buttons to press are Pa, S twice, W, O and Rd:

- Polonius will now be viewing the hero in the password room. Click the spider when it appears:

- The spider will open a panel at the right side of the screen.
- Click the panel to open it.
- Click the red wire to disconnect it:

- Click the green button to start the first boss battle.
Boss Battle – Polonius
- Click the princess twice and she will drop into the water.
- Click the electricity button to turn the power off:
- Click Polonius and he will hold a bomb.
- Click the bomb and it will explode.
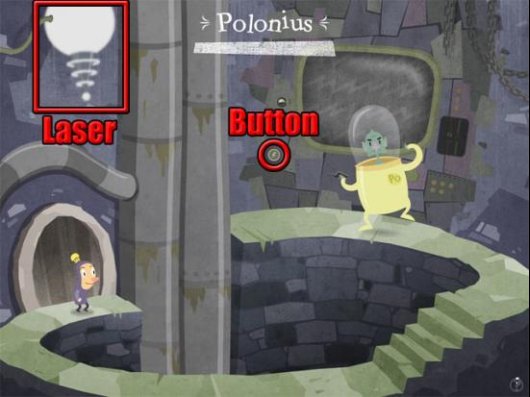
- While Polonius is stunned, click the laser and it will point toward Polonius.
- Click the electricity button to turn the power on.
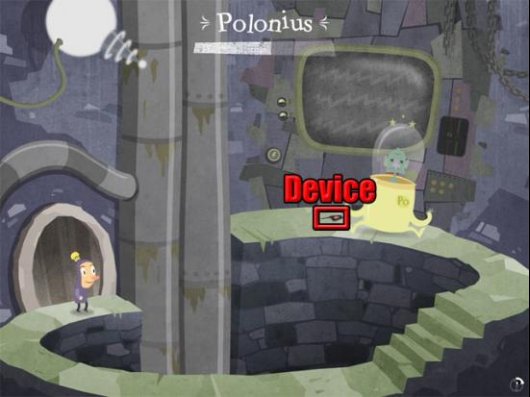
- Click the red button on the device to defeat Polonius:
Act 2
Underwater
- Click the diving helmet to remove the cover:

- Click the diving helmet again and an eel will scare away the fish.
- Click Ophelia and a mine will appear.
- Click the hero and he will think of a crab.
- Click the crab in the thought bubble:

- The crab will cut the chain on the mine.
- Click Ophelia to be swallowed by the fish.
Inside the Fish
- Click the shutters on the house to open them.
- Wait until there is a short gap of silence in the snoring and then click the bell to wake the man:

- Click the man and he will start fishing.
- When the line starts bobbing, click the man and he will catch a fish.
- Click one of the penguins and it will jump onto the fish:

- Click the bell and the man will exit the house again.
- Repeat the method of catching a fish.
- Click one of the remaining two penguins and it will jump onto the fish.
- Click the bell and the man will exit the house again.
- Repeat the method of catching a fish.
- Click the remaining penguin and it will jump onto the fish.
- With the penguins gone, Ophelia’s cage will appear.
- Select the lock on the cage:

- To solve this puzzle, think about what the face on the sun would look like if it were written as a letter. For example, the happy face could be represented as a D, the surprised face as an O, the frowning face as a C, and so on. The full list of faces and the correct letters are shown below:

- Click the correct letter and the yellow arrow will stay in. Keep clicking the correct letters a total of seven times to unlock the lock.
- In the evacuation plan puzzle, the old man will frequently add new tiles.
- Switch the tiles to complete the evacuation plan:

Boss Battle – Claudius
- Click the curtains to reveal Claudius.
- Click the notes that appear above his guitar.
- You will need to click 1, 2, 3, 4 and then 5 notes. The notes must be clicked quickly or else the sequence will reset back to 1 note.
- Click the curtains again to reveal Claudius.
- Click the left pipe and a duck will appear:

- Click the duck three to move it into the right pipe.
- Click the tap to defeat Claudius:

Act 3
Cargo Hold
- Click the hero to reveal his thoughts.
- Notice the equation in the thoughts.
- Click the box and a cannon will appear:
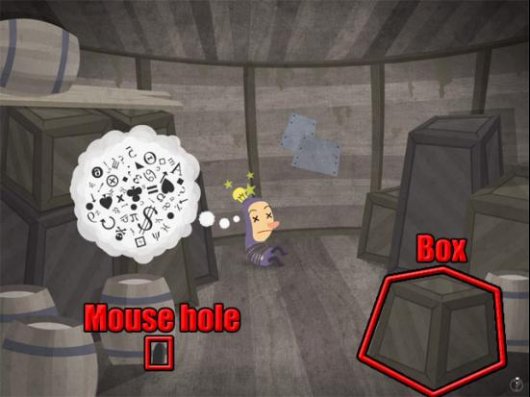
- Click the mouse hole and the mouse will change the angle of the cannon.
- While the cannon is pointing up, click the cannon to blast a hole in the ceiling.
- Click the hole in the ceiling and a monkey will appear.
- The aim now is to click objects to change the equation.
- Start by clicking the cannon until the equation 2 x 2 = 5 is shown.
- Clicking the top-left barrel increases the result by 2.
- Clicking the monkey once increases the result by 1. Clicking again decreases the result by 1.
- The aim is to make the equation 2 x 2 = 4:

- Click the monkey to play a card game.
- When one or more diamonds are shown in the top card, select the scroll card.

- When a scroll is shown in the top card, select the scissors card.

- When scissors are shown in the top card, select the card with one or more diamonds on it.

- Complete the card game against the monkey.
- Hamlet climbs up the ladder to enter the dark room.
Dark room

- Click the right hook to raise the cargo.
- Click the ladder to climb up.
- Click the right hook to lower the cargo.
- Click the cargo to walk onto it.
- Click the right hook to exit the room.
Ship’s deck
- Walk left to get caught by octopus.
- Click the cargo and a pig will appear:

- Click on the pig and a cannon will appear.
- Click on the cannon to hit the tentacle.
- Click both of the eyes on the octopus:

Boss Battle – Rosencrantz and Guildenstern
- Open the door to reveal a slider bar.
- Click the slider and the helm will move to the right.
- Click the left tentacle to defeat Rosencrantz:

- Click the slider and the helm will move to the left.
- Click the helm to spin it.
- Click the rocket to fire it at Guildenstern:
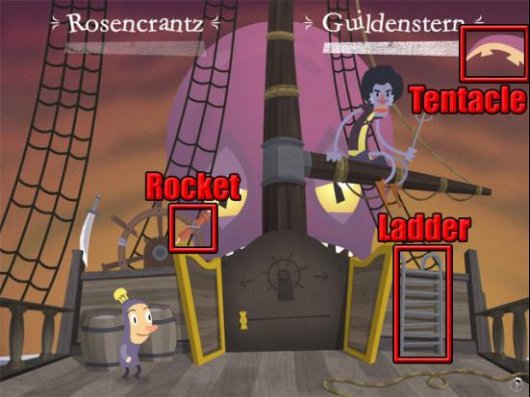
- Click the right tentacle to defeat Guildenstern.
- Click the ladder to take control of the helm.
Act 4
Map
- Different route choices are presented as you follow the map.
- The hero will return to the start if the wrong choice is made.
- Follow the route shown below:

Town Square
- Click the hero to enter the crowd.
- Click the hero in the following 15 locations:

Corridor
- The following rooms can be visited in this section:

- From the start point at room 4, move right to room 5, right to room 3, left to room 7, right to room 2 and left to room 6.
Throne Room Entrance
- Select the shapes on the door to change them.
- Change the shapes so that the square and plus are on the top row and the triangle and square are on the bottom row:

Boss Battle – Laertes
- Click on the light switch to start the boss battle:

- Click the lamp and then click the flowerpot:

- The lamp will now be on the right side of the room.
- Click the plug on the lamp:

- Click the lamp to defeat Laertes.
Act 5
On the horse
- Click the horse to see its thoughts.
- Click the black dot in the thought bubbles:

Outside the Hideout
- Click the door 50 times and the hero will get knocked out.
Death
- Each panel on the platform has a different colour.
- Look at the colour in death’s eyes and then press the panel that has the same colour:

- After pressing the correct panel 21 times an hourglass will appear.
Hourglass
- Click the pebble and an arrow will start moving.
- After the arrow has moved from left to right six times, a new direction will appear on the seventh time around.
- Click the pebble when this new direction appears:

Boss Battle – Claudius
- Select Claudius and a small target will appears.
- The target can appear from different slots on the machine:
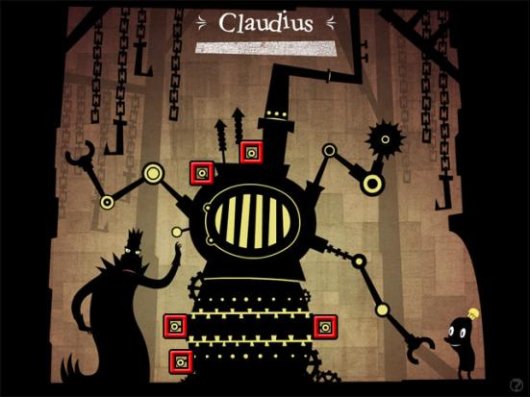
- Click the target and another target will appear from the machine arm.
- Click the target on the arm to complete the game:


_capsule_fog__medium.png)


